Retention bandage
Tubinette
A protective tubular bandage that supports frequent dressing changes
 Tubinette

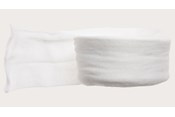

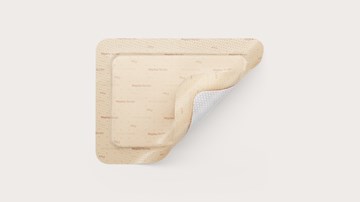
Tubinette® is stockinette made from 100% viscose that holds dressings that have to be changed frequently comfortably and securely in place, without constriction or compression. It also protects clothes and bedding from ointments and creams.
Its tubular construction makes application quick and easy, with or without a tubular bandage applicator.
- Holds dressings comfortably and securely in place
- Quick and easy to apply, with or without an applicator
- Range of eight sizes makes it easy to retain dressings anywhere on the body
- Particularly suitable for use with frequent dressing changes
- Cost-effective solution
MISSING TAGS
hidden1hidden2
Further product information
When to use Tubinette
Tubinette is intended for when dressings have to be changed frequently, and is available in a range of sizes for use on fingers, toes and limbs.
Simple finger application
hidden1hidden2
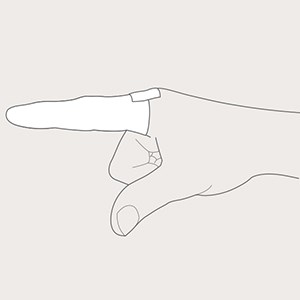
 To apply a dressing retention bandage on a finger, measure from head of metacarpal to fingertip, using size 00 or 01 stockinette, double it and add 2-3cm. Load onto finger applicator.
To apply a dressing retention bandage on a finger, measure from head of metacarpal to fingertip, using size 00 or 01 stockinette, double it and add 2-3cm. Load onto finger applicator.
hidden1hidden2
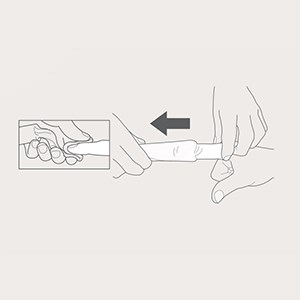
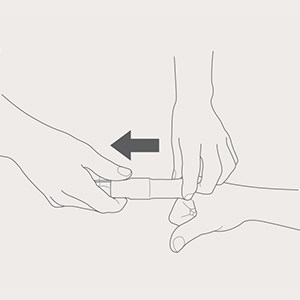 Pass the loaded applicator over the dressing and hold the tubular bandage at the base of the finger. Pull the applicator straight back past the fingertip.
Pass the loaded applicator over the dressing and hold the tubular bandage at the base of the finger. Pull the applicator straight back past the fingertip.
hidden1hidden2
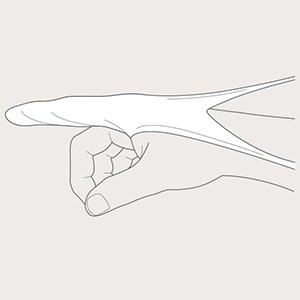
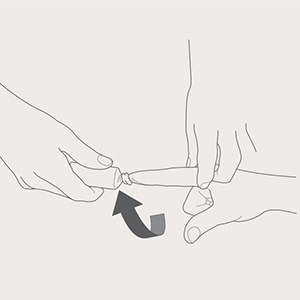 Twist until the end of the bandage is closed –approximately 11/2 turns – and push the applicator back over the finger, twisting on the way back down.
Twist until the end of the bandage is closed –approximately 11/2 turns – and push the applicator back over the finger, twisting on the way back down.
hidden1hidden2
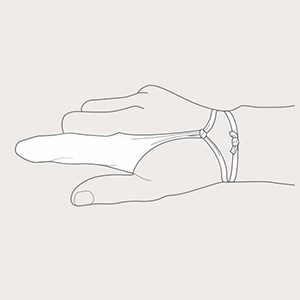
 If the finger is bleeding, more twist should be applied to increase the pressure – less twist for an infected finger. The bandage is now secured at the base of the finger with a piece of adhesive tape.
If the finger is bleeding, more twist should be applied to increase the pressure – less twist for an infected finger. The bandage is now secured at the base of the finger with a piece of adhesive tape.
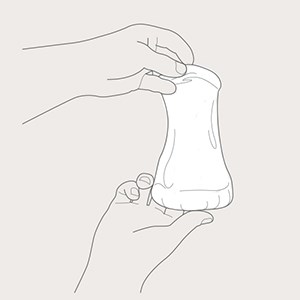
Finger-stall application
hidden1hidden2
 For a finger-stall bandage, take 6 times the length of the finger and pass over finger as for the ‘simple finger’application. For tip injury (inset), take 8 times the length and pull 5-6cm off the end of the applicator, lay the bandage on top of the dressing, then underneath, and pass the applicator over the finger.
For a finger-stall bandage, take 6 times the length of the finger and pass over finger as for the ‘simple finger’application. For tip injury (inset), take 8 times the length and pull 5-6cm off the end of the applicator, lay the bandage on top of the dressing, then underneath, and pass the applicator over the finger.
hidden1hidden2
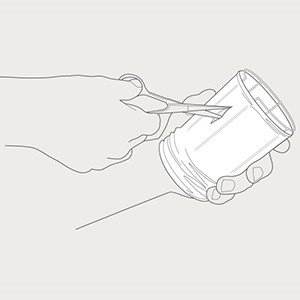
 Hold the bandage at the base of the finger, pull the applicator straight back, allowing the bandage to cover the dressing. Twist at the fingertip and twist on the way back down. Turn the hand palm upwards and cut through the remaining bandage down to the base of the finger.
Hold the bandage at the base of the finger, pull the applicator straight back, allowing the bandage to cover the dressing. Twist at the fingertip and twist on the way back down. Turn the hand palm upwards and cut through the remaining bandage down to the base of the finger.
hidden1hidden2
 Make a hold at the site of the wrist and cut the remaining bandage to provide 2 tails for tying. Tie a knot to prevent any fraying of the bandage.
Make a hold at the site of the wrist and cut the remaining bandage to provide 2 tails for tying. Tie a knot to prevent any fraying of the bandage.
hidden1hidden2
 Take the tails twice round the wrist and tie, making the bandage completely secure. For bulky dressings, it may be necessaryto use size 12 stockinette.
Take the tails twice round the wrist and tie, making the bandage completely secure. For bulky dressings, it may be necessaryto use size 12 stockinette.
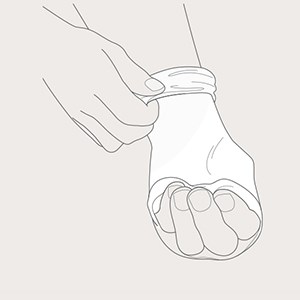
Hand application
hidden1hidden2
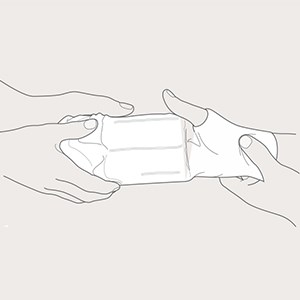
 Measure 3 times the length of the hand, from wrist to fingertip. Using size 34, load the E size applicator and make a small hole approximately 5cm from the end, where there is a gap in the applicator.
Measure 3 times the length of the hand, from wrist to fingertip. Using size 34, load the E size applicator and make a small hole approximately 5cm from the end, where there is a gap in the applicator.
hidden1hidden2
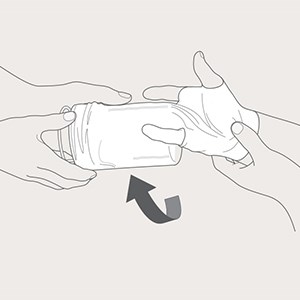
 Pass the applicator over the hand, the thumb coming through the hole. Pull the bandage on to the wrist and secure.
Pass the applicator over the hand, the thumb coming through the hole. Pull the bandage on to the wrist and secure.
hidden1hidden2
 Twist towards the thumb and, when level with the base of the fingers, make two small holes for the first and little fingers.
Twist towards the thumb and, when level with the base of the fingers, make two small holes for the first and little fingers.
hidden1hidden2
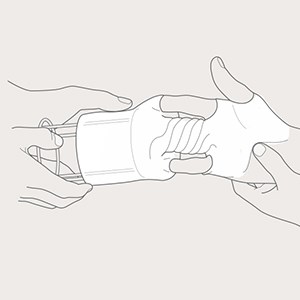 Continue to twist the applicator and bandage until the gap in the E applicator comes to the top. Make 2 holes in the bandage again, for the first and little fingers.
Continue to twist the applicator and bandage until the gap in the E applicator comes to the top. Make 2 holes in the bandage again, for the first and little fingers.
hidden1hidden2
 The bandage is now passed back over the hand,after cutting a final hole for the thumb. The second layer of bandage is secured at the wrist with adhesive tape, or cut to provide 2 tails, and tied.
The bandage is now passed back over the hand,after cutting a final hole for the thumb. The second layer of bandage is secured at the wrist with adhesive tape, or cut to provide 2 tails, and tied.
Arm application
hidden1hidden2
 Using size 56 stockinette, measure 3 times the area to be covered. Load the appropriate applicator and start at the middle of the dressing.
Using size 56 stockinette, measure 3 times the area to be covered. Load the appropriate applicator and start at the middle of the dressing.
hidden1hidden2
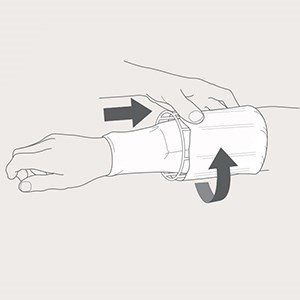 Pull the applicator and bandage over the dressing to approximately 5cm below the dressing, and twist the applicator, continuing to twist while moving up the arm to approximately 5cm above the dressing. Twist again to lock.
Pull the applicator and bandage over the dressing to approximately 5cm below the dressing, and twist the applicator, continuing to twist while moving up the arm to approximately 5cm above the dressing. Twist again to lock.
hidden1hidden2
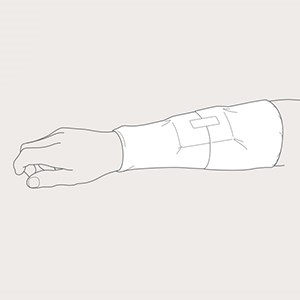 Continue twisting until the bandage runs out, then secure with a piece of adhesive tape on top of the dressing.
Continue twisting until the bandage runs out, then secure with a piece of adhesive tape on top of the dressing.
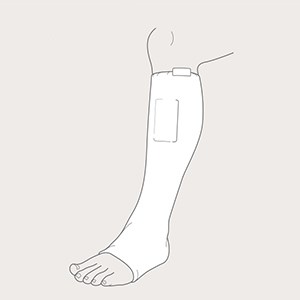
Leg application
hidden1hidden2
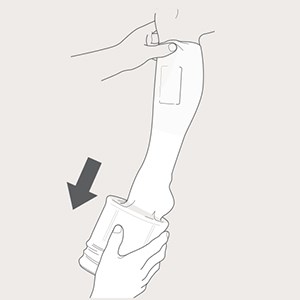 Load the applicator with size 78 stockinette, after measuring 3 times the length of the area to be covered. Pass the applicator over the limb and pull the bandage onto the leg, holding it in position.
Load the applicator with size 78 stockinette, after measuring 3 times the length of the area to be covered. Pass the applicator over the limb and pull the bandage onto the leg, holding it in position.
hidden1hidden2
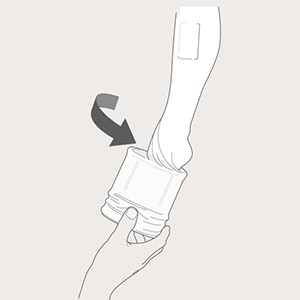 Pull the applicator and bandage down the limb with a slight wisting motion, which will make the bandage conform. Twist at the distal end for 11/2 turns to ‘lock’ the bandage.
Pull the applicator and bandage down the limb with a slight wisting motion, which will make the bandage conform. Twist at the distal end for 11/2 turns to ‘lock’ the bandage.
hidden1hidden2
 Push the applicator and bandage back up the limb with a slight twisting motion, until it runs out. It can now be taped into position, the dressing being securely held in place.
Push the applicator and bandage back up the limb with a slight twisting motion, until it runs out. It can now be taped into position, the dressing being securely held in place.
Head application
hidden1hidden2
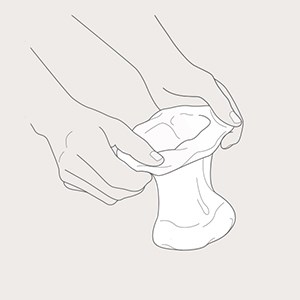
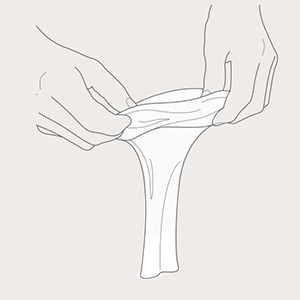 Take approximately 80cm of size T1 stockinette and roll down until there is approximately 20cm left.
Take approximately 80cm of size T1 stockinette and roll down until there is approximately 20cm left.
hidden1hidden2
 Pull the remaining bandage through from the inside, so that it is now turned inside out.
Pull the remaining bandage through from the inside, so that it is now turned inside out.
hidden1hidden2
 Roll down the remainder of the bandage, so that 2 rolls have now been formed: a small roll and a larger roll.
Roll down the remainder of the bandage, so that 2 rolls have now been formed: a small roll and a larger roll.
hidden1hidden2
 The best way to do this is by placing it onto a flat surface to avoid the bandage unrolling.
The best way to do this is by placing it onto a flat surface to avoid the bandage unrolling.
hidden1hidden2
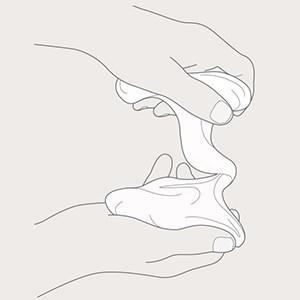 Make a twist with the rolls for 11/2 turns.
Make a twist with the rolls for 11/2 turns.
hidden1hidden2
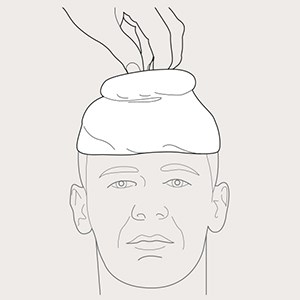 Place the smaller roll onto the head, over the dressing, and unroll. This should finish at the hairline.
Place the smaller roll onto the head, over the dressing, and unroll. This should finish at the hairline.
hidden1hidden2
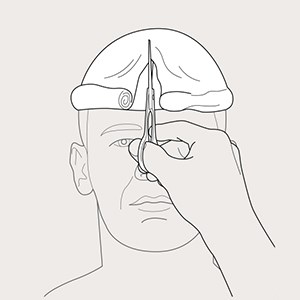 Unroll the larger roll over the head and, when in line with the first layer, cut through the roll, in line with the nose.
Unroll the larger roll over the head and, when in line with the first layer, cut through the roll, in line with the nose.
hidden1hidden2
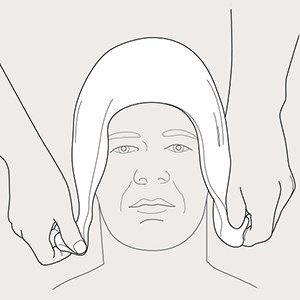 Unroll the remainder of the bandage and turn the edges under, so that the bandage is not covering the face.
Unroll the remainder of the bandage and turn the edges under, so that the bandage is not covering the face.
hidden1hidden2
 Tie the 2 tails underneath the chin, so that the head bandage is completely secure.
Tie the 2 tails underneath the chin, so that the head bandage is completely secure.
hidden2
Products and solutions
Related products

hidden1hidden2


